Make a film
Pick a recipe, choose the pictures, set the length, formats, languages and voice, choose Creative or Faithful, and read the price before anything is made.
Pick a recipe
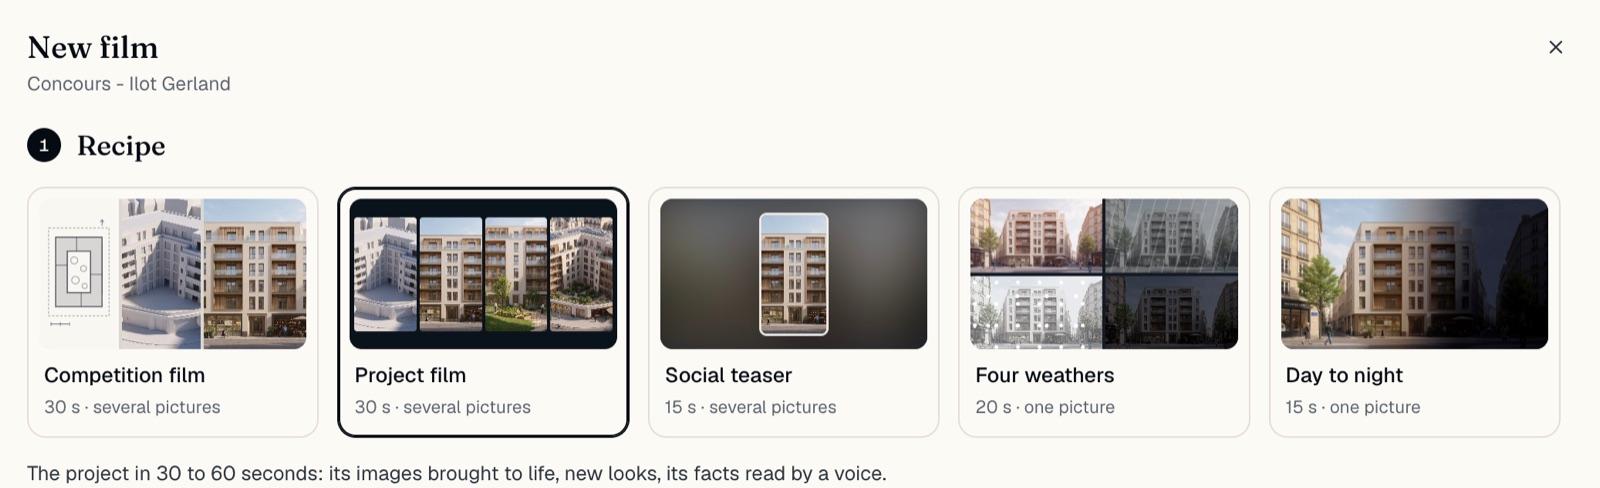
On the project page, click New film, then pick a recipe.
Project film: the project in 30 to 60 seconds, its pictures brought to life, new looks, its facts read by a voice. Faithful by default.
Competition film: for a jury, the plan, the massing model as it is, then the renders, described by a calm voice and anonymous. See “Prepare a competition entry”.
Social teaser: 15 seconds for Instagram, TikTok and LinkedIn, up to four pictures moving on music, a few words on screen.
Four weathers: one picture at dawn, in the rain, in the snow and at night.
Day to night: one picture, from the morning light to the lit windows of the evening.
Choose the pictures
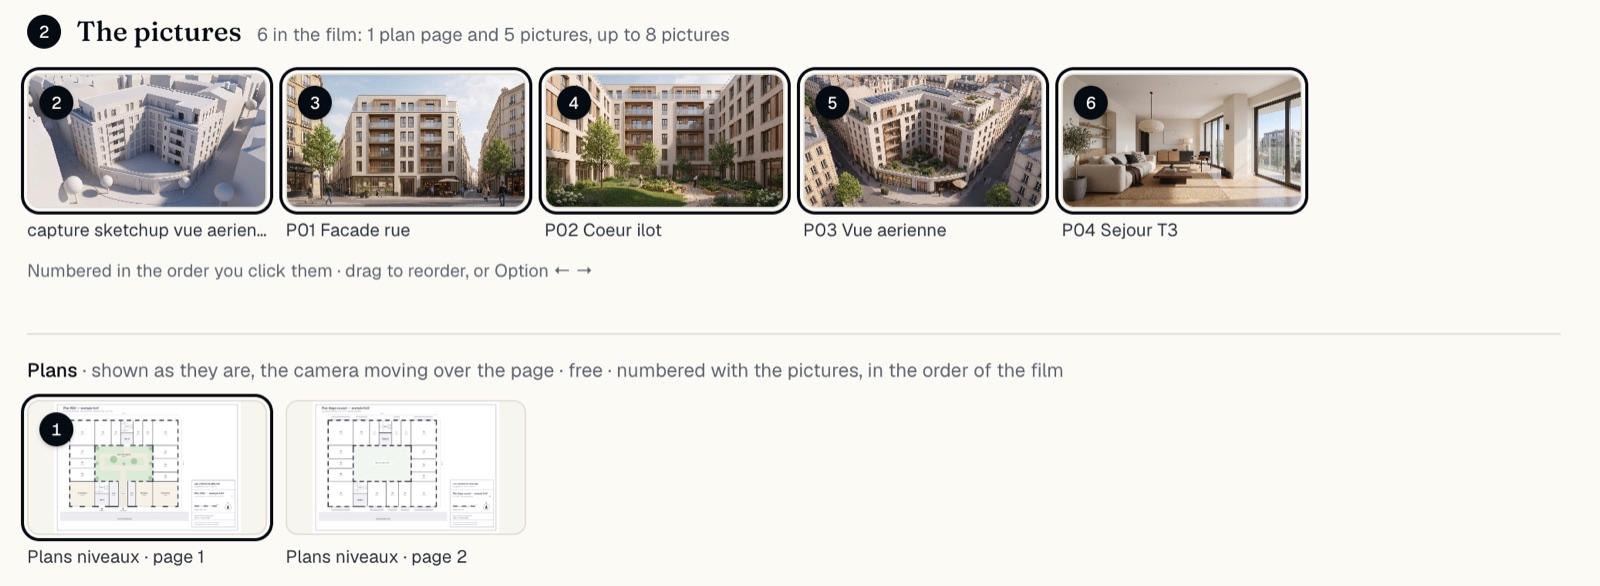
Click the pictures you want, in the order you want them: each one gets its number. Drag a picture to move it, or press Option ← → on it. Choose none, and BrickNote picks from all of them.
Plan pages are shown as they are: the whole page on paper, the camera moving gently over it. They cost nothing. The weather recipes take a single picture.
Add a massing clip or a time-of-day sequence
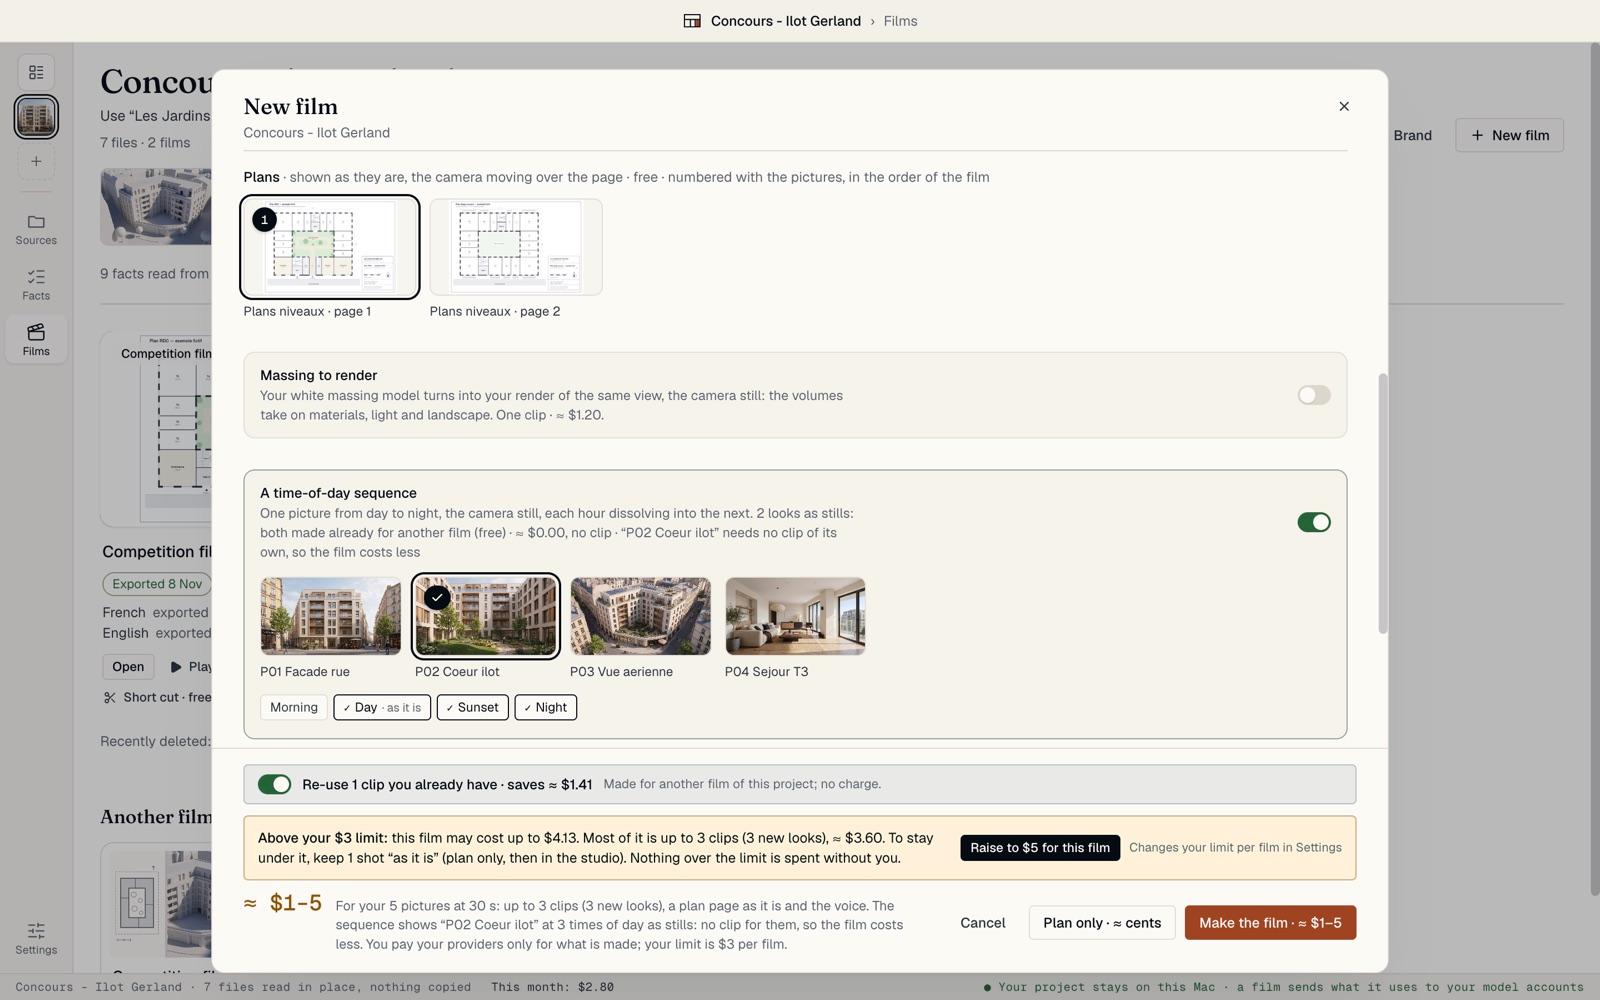
In a Project film or a Competition film, two options sit under the pictures.
Massing to render turns your white massing model into your render of the same view, the camera still. It is one clip, priced beside it, and off by default.
A time-of-day sequence shows one picture at several moments, such as Day, Sunset and Night, each dissolving into the next. Day is your picture as it is. The other moments are still pictures, not clips: a few cents each. A moment another film already made is reused at no charge.
Set the length, formats and languages
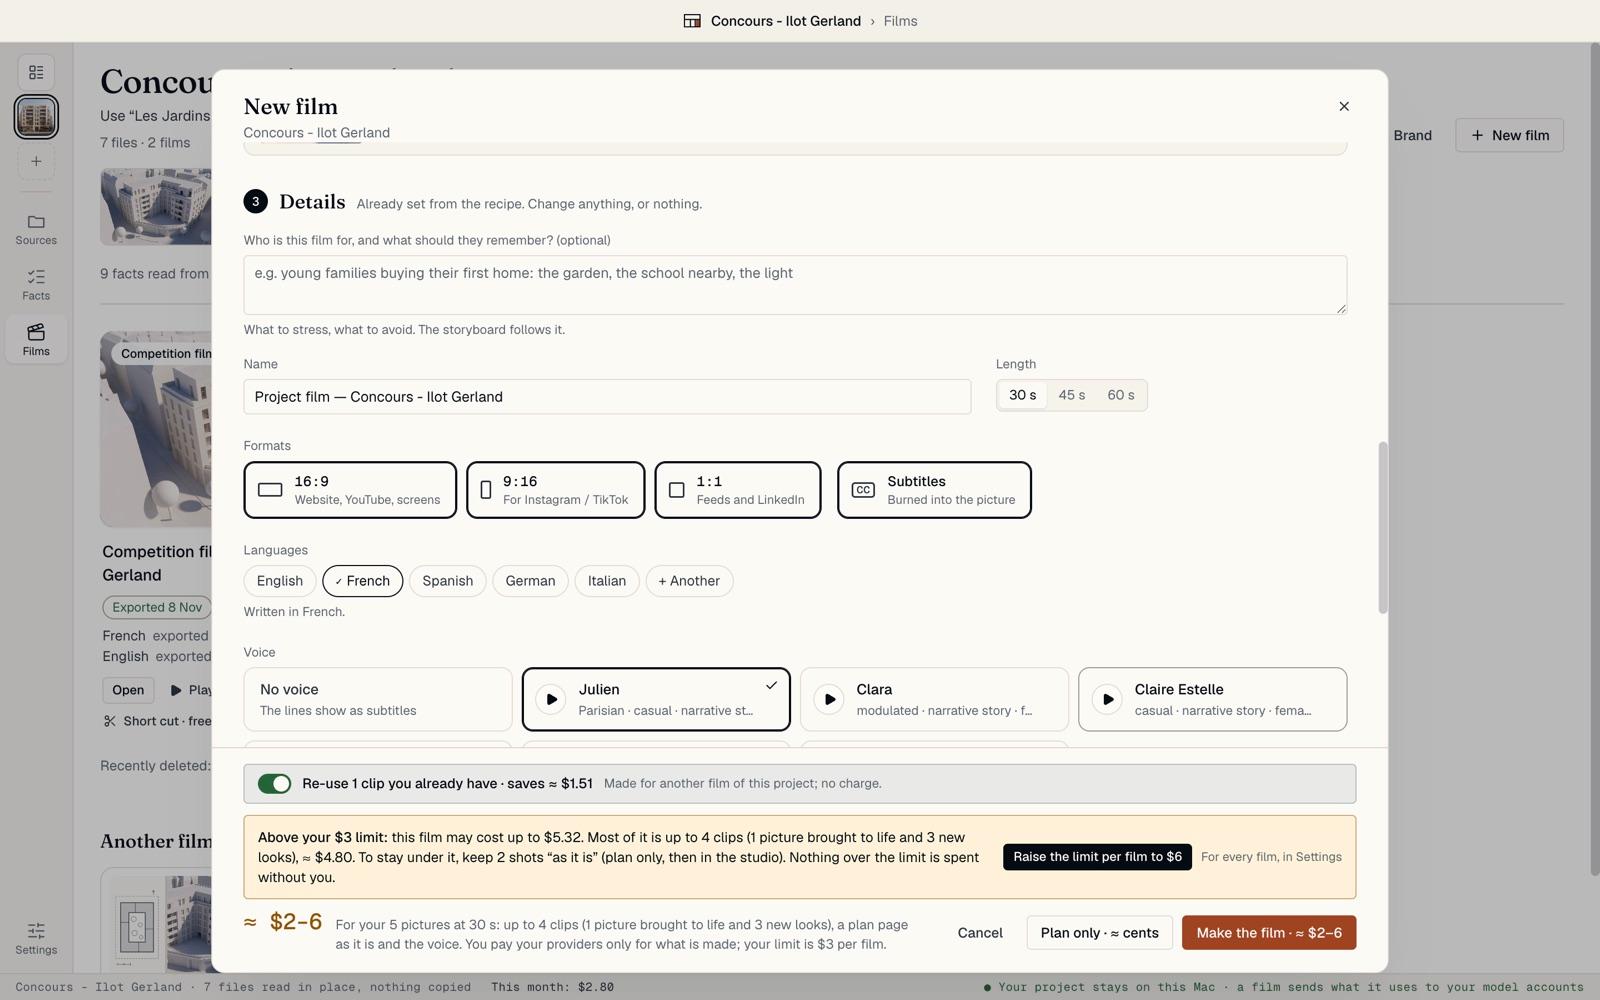
First, Who is this film for, and what should they remember? (optional) tells the storyboard your audience, what to stress and what to avoid.
Under it, in Details, the recipe has already set everything. Click Edit to change it.
Length: 30, 45 or 60 seconds for a Project film.
Formats: 16:9 for a website, YouTube and screens, 9:16 for Instagram and TikTok, 1:1 for feeds and LinkedIn. Subtitles burns the lines into the picture.
Languages: the lines are written in the first one and translated into the others. + Another adds a language by its code.
The next time, the details start from your last film of the same recipe: its length, formats, languages, voice and music. Use the recipe’s settings goes back to the recipe’s own.
Choose the voice, the music and the mode
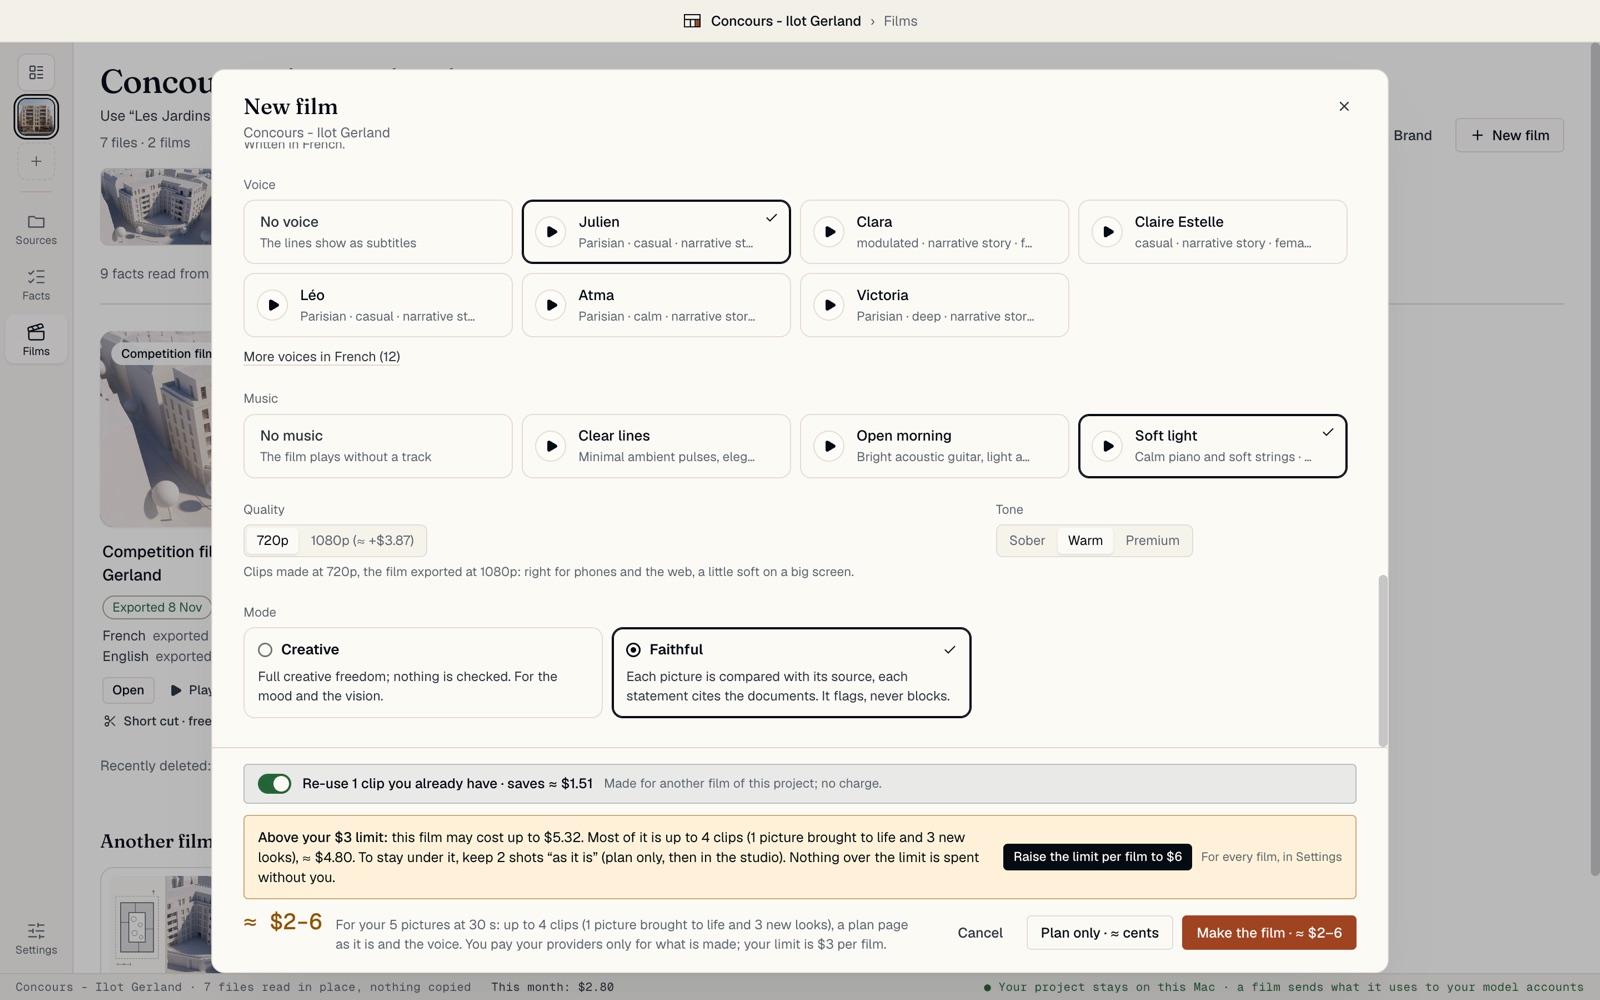
Voice: a short list of voices for the film’s language, each with a button to listen to it. No voice shows the lines as subtitles. Music: three tracks, or No music.
Quality: 720p suits phones and the web; 1080p is sharper on a big screen and costs more. Tone: Sober, Warm or Premium.
Mode: Creative gives full creative freedom and checks nothing, for the mood and the vision. Faithful compares each picture with its source, and each statement cites your documents. It flags, it never blocks.
Read the price, then make it
The price shows at the bottom before anything is made, as a range: here ≈ $2–6, for a few clips, a plan page and the voice. You pay your providers only for what is made.
If another film of the project already paid for clips of these pictures, a switch such as Re-use 1 clip you already have takes them at no charge. If the film may cost more than your limit, BrickNote says what drives the cost and offers a button such as Raise the limit per film to $6 (it applies to every film), or to keep some shots as they are.
Plan only · ≈ cents writes the storyboard and makes nothing else. Make the film writes it and makes everything. Above $2, BrickNote asks once more before it spends.

Let it make the film
BrickNote writes the storyboard, then the studio opens and the shots fill in one by one. You can keep working meanwhile. Your Mac tells you when the film is ready.
If a still or a clip fails, its shot says so, says whether you may have been charged for it, and offers to try again.